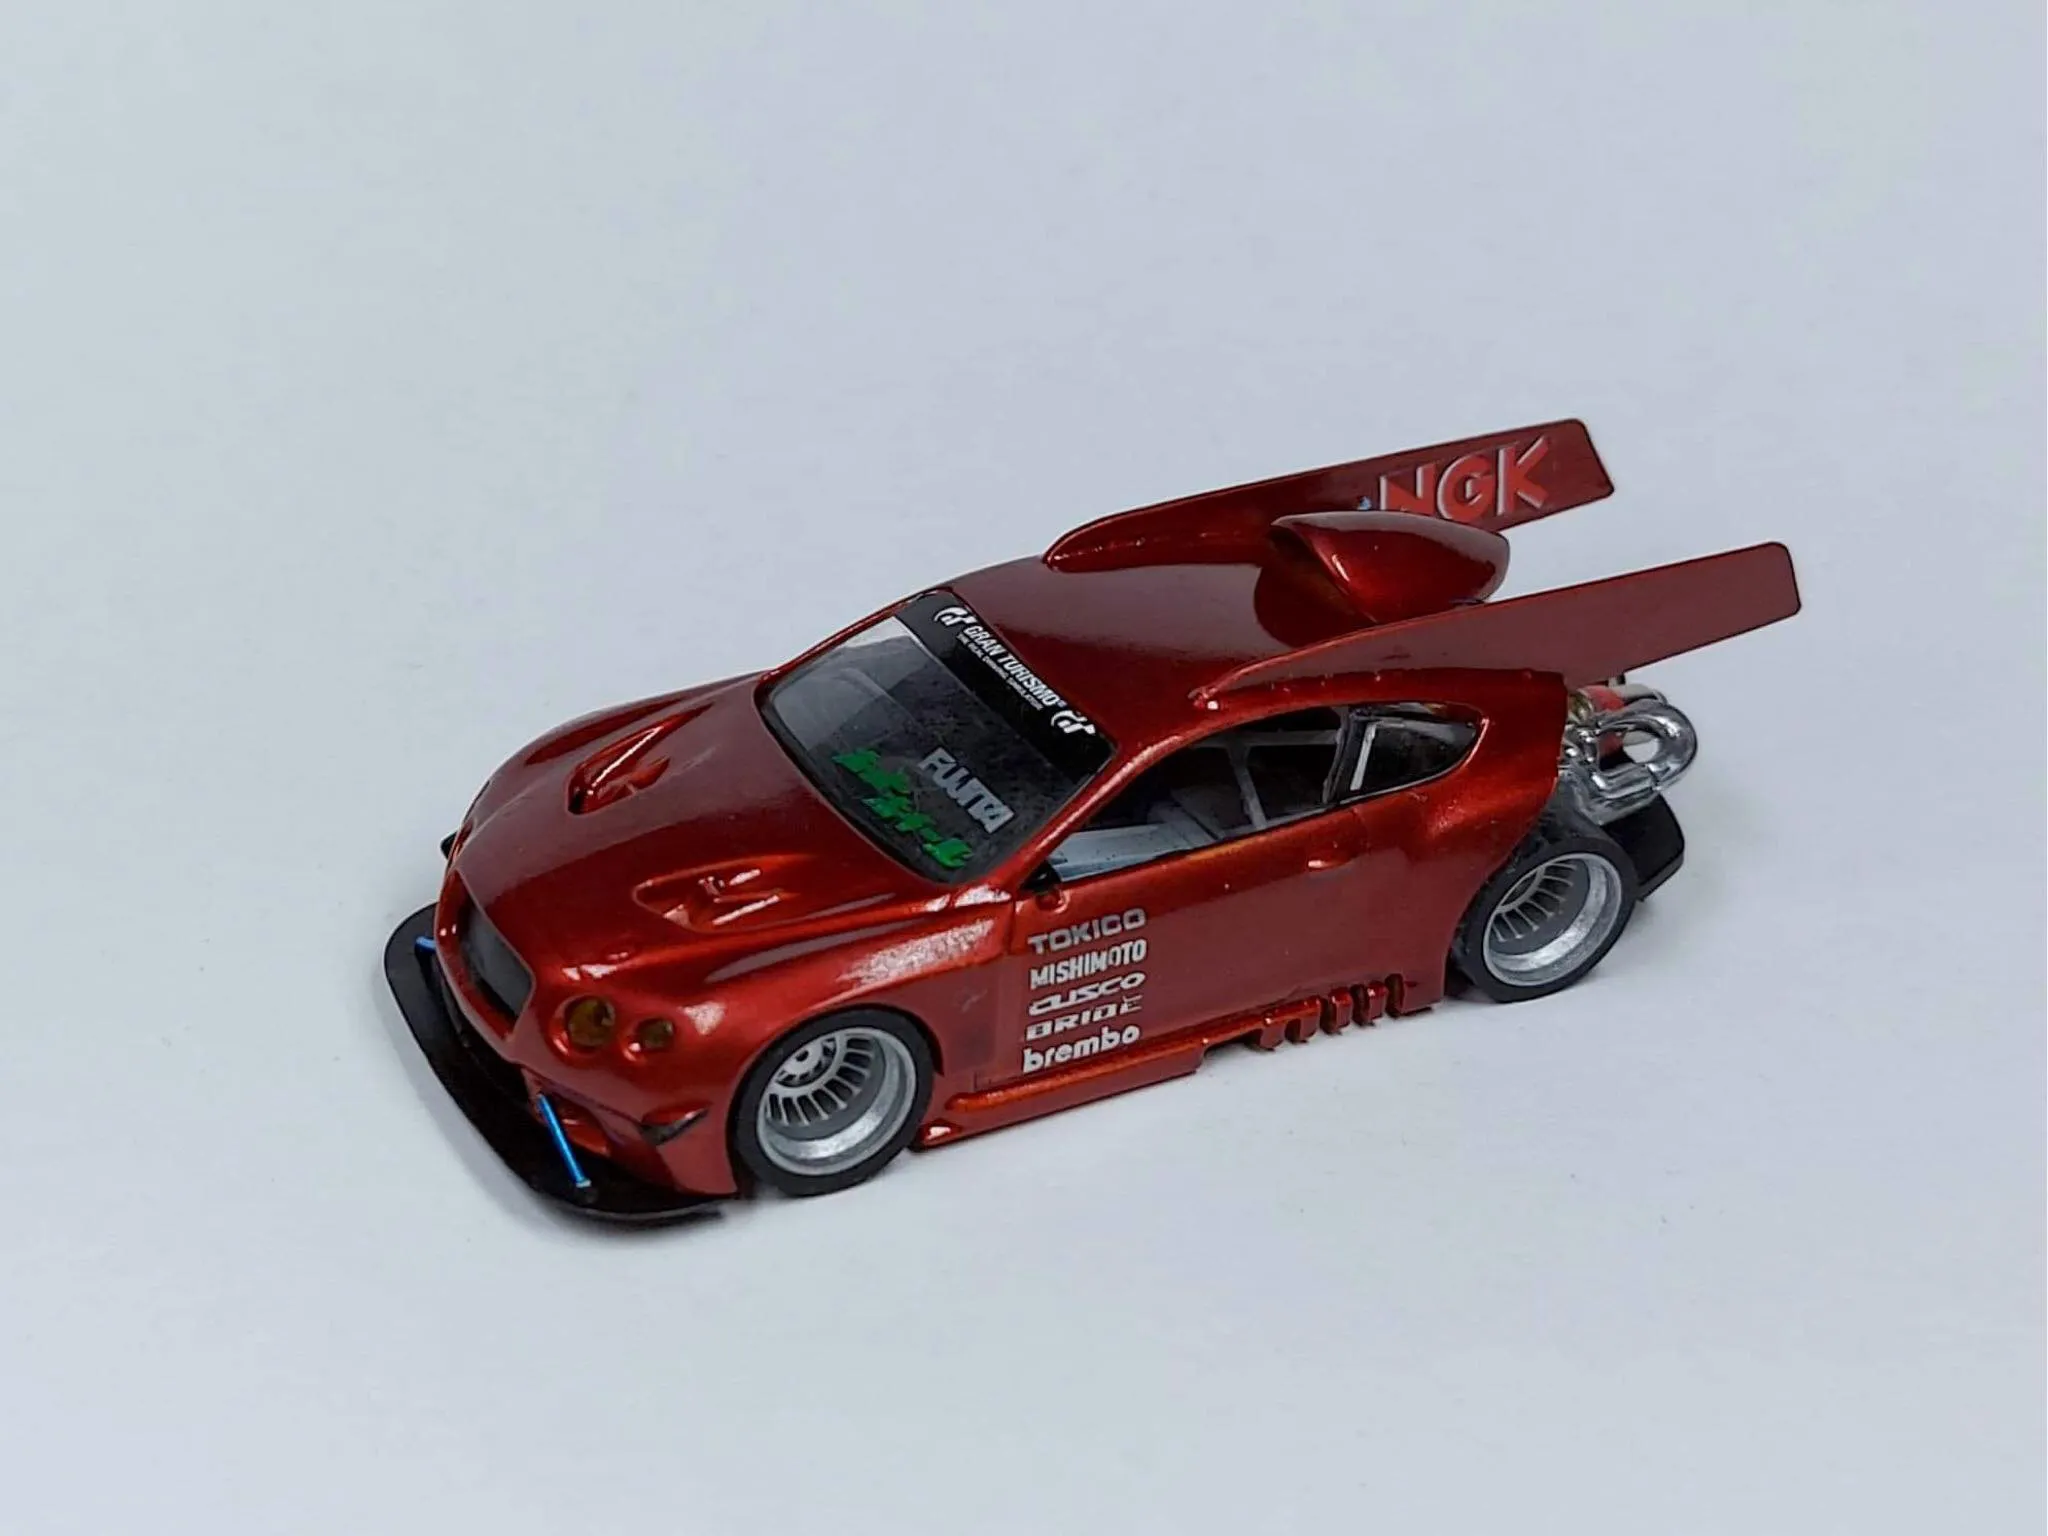
What is a Custom Diecast Car?
A custom diecast car is a unique, personalized miniature replica of a real-life vehicle, meticulously crafted using the diecasting process. This process involves injecting molten metal, typically zinc alloy, into a mold to create intricate and detailed car models. Unlike mass-produced diecast cars, custom models are designed and built to specific individual preferences, making them highly sought-after collectibles. These cars offer a way for enthusiasts to own a miniature version of their dream car, a cherished family vehicle, or a unique piece of automotive history. The level of customization can range from simple paint jobs and decal applications to extensive modifications, including engine detailing, interior enhancements, and even functional features. The result is a one-of-a-kind model that reflects the owner’s individual style and passion for cars.
Benefits of Owning a Custom Diecast Car
Owning a custom diecast car provides several benefits, starting with the unparalleled personalization it offers. You have complete control over the design, allowing you to replicate a specific car, add unique features, or create a model that perfectly matches your vision. This level of personalization fosters a deeper connection with the car, making it a cherished item. Custom diecast cars also hold significant value for collectors. Limited production runs and unique designs often make these models more valuable than their mass-produced counterparts. The craftsmanship and attention to detail that go into creating a custom car add to its collectibility. Moreover, owning a custom diecast car can be a satisfying hobby, offering a creative outlet for car enthusiasts. It’s a way to celebrate a passion for cars, allowing you to appreciate the beauty and engineering of vehicles in miniature form, whether for personal enjoyment or as a valuable investment.
The Process of Creating a Custom Diecast Car

The journey of bringing a custom diecast car to life involves several key steps, starting with meticulous planning and design. The initial phase includes conceptualizing the project, researching the desired vehicle, and gathering reference materials. Once the design is finalized, the process moves to selecting the base model. Depending on the level of customization, modifications may be made to the existing diecast shell or entirely new parts may be fabricated. This stage often involves disassembling the car, stripping the paint, and preparing the surface for the new customizations. Next, the car is repainted with the chosen color, followed by the application of decals, graphics, and other detailing elements. The interior is then meticulously enhanced, including the addition of custom seats, dashboards, and other features. The engine and chassis are detailed to match the vehicle’s specifications. Finally, the car is reassembled with all the custom components, carefully inspected for quality, and prepared for delivery.
Research and Planning Your Custom Diecast Car
Before diving into the creation of your custom diecast car, thorough research and planning are essential. Begin by identifying the specific vehicle you wish to replicate, whether it’s a classic car, a modern sports car, or a family vehicle. Gather extensive reference materials, including photographs, technical drawings, and any available information about the car’s history and specifications. Decide on the scale of your model, typically 1 18, 1 24, or 1 43. These scales impact the level of detail and the overall size of the finished product. Consider the level of customization you desire, from simple paint and decal changes to extensive modifications. Set a realistic budget, as custom car projects can range in cost depending on complexity. Research custom diecast car makers, looking at their portfolios, experience, and customer reviews. Create a detailed design plan, outlining the modifications, colors, and detailing elements. This plan will serve as a blueprint for your project, ensuring your vision is clearly communicated to the car maker and contributing to a successful outcome.
Choosing the Right Scale and Model
Selecting the right scale and base model is a crucial decision when creating a custom diecast car. The scale determines the size and level of detail of your finished model. Common scales include 1 18, 1 24, and 1 43, each offering different advantages. A 1 18 scale provides the most detail and allows for intricate modifications. These models are larger and require more space for display, making them ideal for showcasing intricate features. 1 24 scale models are a good balance of detail and size, being more compact and often less expensive than 1 18 scale models. They provide sufficient space for customization, making them a popular choice. 1 43 scale models are smaller and more affordable, excellent for building collections or displaying a wide variety of vehicles. Once you’ve chosen the scale, select a base model. This will be the foundation of your custom car. Choose a model that closely resembles the vehicle you want to create, as it will require fewer modifications. Consider the model’s availability and the quality of its existing details. Look for models with good potential for customization, such as those with removable parts or detailed interiors. This selection process directly influences the level of realism and the ultimate success of your project.
Selecting Customization Options

Customization options for your diecast car are vast, providing the opportunity to personalize your model in numerous ways. The most basic customization involves the paint job. Choose the exact color or colors to match the real vehicle, using high-quality paints for a professional finish. Decals and graphics are a popular way to add detail and authenticity, whether it’s adding racing stripes, sponsor logos, or custom designs. Engine detailing is another significant option, enhancing the engine bay with custom parts, wiring, and other components. Interior modifications can greatly improve the realism. Adding custom seats, dashboards, steering wheels, and other interior details can transform the car’s look. Wheels and tires are crucial for completing the look of a custom car, with a range of options, from different styles to realistic tires with detailed treads. Lighting is also a great way to add realism, including headlights, taillights, and interior lights. Some customizers offer functional features, such as opening doors, hoods, and trunks. Consider all these options and decide which customizations best reflect your vision and budget.
Finding a Reputable Custom Diecast Car Maker
The success of your custom diecast car project depends heavily on selecting the right car maker. Start by researching various customizers online, examining their portfolios, and looking at their past projects. Pay close attention to the quality of their work, the level of detail, and their overall craftsmanship. Read customer reviews and testimonials to gauge their reputation for reliability, communication, and the quality of their work. Check to see if the car maker specializes in the type of customization you require. Some may excel in painting, while others are skilled in engine detailing or interior modifications. Contact the car maker directly to discuss your project and inquire about their pricing, turnaround time, and level of experience. Make sure to clearly communicate your vision and ask detailed questions about the process. Ensure that the car maker is responsive, professional, and willing to address your questions. It’s important to find a customizer who understands your vision, has a strong reputation, and is capable of delivering high-quality work on time and within budget.
Communication and Design Approval
Clear communication and design approval are essential for ensuring your custom diecast car meets your expectations. Once you’ve selected a car maker, provide them with detailed instructions, reference photos, and any other relevant information about your project. Discuss your ideas with the car maker to clarify your vision, and actively engage in the design process. The car maker will likely provide design mockups or sketches, showing how the final product will look. Review these mockups carefully, and offer any necessary feedback or suggestions. Be as specific as possible with your requests to avoid misunderstandings. Before the work begins, finalize the design and get written approval from the car maker. This document should include all the specifications, colors, decals, and modifications. Throughout the project, stay in regular contact with the car maker to check on the progress, ask questions, and provide feedback. Regular communication helps ensure that the final product aligns with your expectations and addresses any issues promptly. This collaborative approach is crucial for a successful project.
Production and Delivery of Your Custom Diecast Car

The production and delivery phase marks the culmination of your custom diecast car project. Once the design is approved, the car maker will begin the customization process. This involves disassembling the base model, preparing the surfaces, painting, applying decals, and adding any custom parts or detailing. During this phase, the car maker meticulously works on each aspect of your car. They will use various techniques and tools to achieve the desired level of detail and realism. Throughout the production process, the car maker may share updates and progress photos, keeping you informed of the progress. Once the customization is complete, the car maker will carefully inspect the car to ensure it meets their quality standards. This may involve checking the paint finish, the alignment of decals, and the functionality of any custom features. After the inspection, the car is carefully packaged to protect it during shipping. The car maker will usually provide tracking information so you can monitor the delivery. Upon receiving your custom diecast car, inspect it immediately to ensure it matches the approved design. If you find any issues, promptly contact the car maker to resolve them.
Cost and Timeline Considerations
Understanding the costs and timeline involved is crucial for planning your custom diecast car project. The cost of a custom car varies widely, depending on the scale, the level of customization, and the car maker’s expertise. More complex projects with extensive modifications and detailing will naturally cost more than simpler ones. Research the car maker’s pricing structure and get a detailed quote before starting the project. Factors to consider include the cost of the base model, the cost of labor, the materials used, and any additional fees for specialized services. Besides the cost, you should also be aware of the timeline. Custom diecast car projects often take several weeks or even months to complete. The exact turnaround time will depend on the car maker’s workload, the complexity of your project, and the availability of parts. Ask the car maker for an estimated completion date, and be prepared to wait. Maintain regular communication with the car maker to monitor the progress and ensure that the project is on track. Be realistic about the time involved, as rushing the process can compromise the quality. Carefully consider both cost and timeline, and make sure they align with your expectations before proceeding with your custom diecast car project.
Displaying and Preserving Your Custom Diecast Car
Once you receive your custom diecast car, consider how you will display and preserve it. Proper display is essential to showcase your model and protect it from damage. Choose a display case or shelf that provides visibility without exposing the car to direct sunlight or dust. Direct sunlight can cause the paint to fade and degrade the materials. Dust can accumulate and damage the model’s surfaces. Consider using a sealed display case to prevent dust accumulation. Display your car alongside other collectibles or in a dedicated car collection space. Careful storage is important to preserve your custom diecast car for years to come. Keep it away from extreme temperatures and humidity. Protect it from accidental damage by storing it in a safe place when not on display. Regularly clean your model using a soft brush or cloth to remove dust and dirt. Avoid using harsh chemicals or abrasive materials, as these can damage the paint or other components. If you handle your model frequently, use gloves to prevent fingerprints and oils from damaging the surface. Taking these measures will protect your investment, ensuring that your custom diecast car remains in pristine condition for years to come.